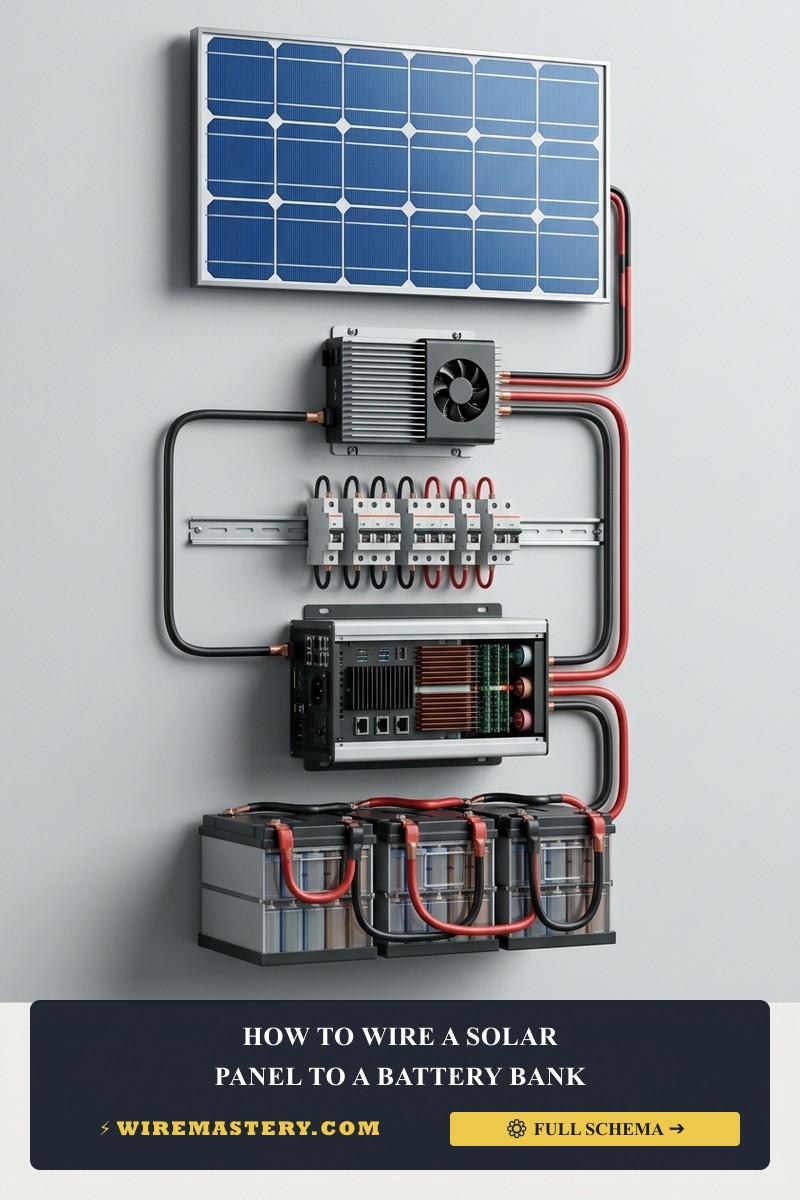
How to Wire a Solar Panel to a Battery Bank: Step-by-Step
Introduction
Wiring a solar panel to a battery bank is a critical task for those aiming to harness solar energy for off-grid living, RV power, or backup energy systems. When planning the layout, understanding the correct configuration for solar battery connections is essential to minimize power drop and prevent overloads. This detailed guide will walk you through the process, ensuring that your system is set up safely and efficiently. By following these instructions, you’ll be equipped to complete a secure solar panel to battery connection, enabling you to store solar energy for later use.
Tools and Materials
| Tool/Material | Description |
|---|---|
| Solar Panel | Typically 100W to 300W, rated for 12V or 24V systems |
| Battery Bank | Deep cycle batteries (Lead-acid or Lithium) |
| Charge Controller | Regulates voltage and current to protect batteries |
| MC4 Connectors | For connecting solar panels to charge controller |
| Battery Cables | Appropriately gauged cables (e.g., 10 AWG or 8 AWG) |
| Fuse or Circuit Breaker | Protects the circuit from overload |
| Wire Strippers | For stripping insulation off wires |
| Crimping Tool | To attach connectors to cables |
| Multimeter | To measure voltage and ensure proper connections |
| Safety Gear | Gloves and safety glasses |
Safety Warning
Before starting, ensure you are wearing appropriate safety gear. Working with electrical systems can pose risks, including electric shock and fire hazards. Always double-check your connections and be cautious when handling tools and materials. Ensure that your system is powered down before making any changes to avoid electrocution.
Step-by-Step Guide
Step 1: Determine Your System Voltage
Identify the voltage of your solar panel and battery bank. Most residential solar panels operate at 12V or 24V. It’s crucial that the solar panel voltage matches the battery bank’s voltage to ensure compatibility.
Step 2: Gather Your Components
Ensure you have all necessary components on hand, including the solar panel, battery bank, charge controller, and all connectors and cables.
Step 3: Install the Charge Controller
-
Select a Location: Choose a dry, well-ventilated area to mount your charge controller, ideally close to your battery bank to minimize voltage drop.
-
Wiring the Charge Controller:
- Connect the positive (+) terminal of the charge controller to the positive terminal of the battery bank using appropriately gauged battery cables.
- Connect the negative (-) terminal of the charge controller to the negative terminal of the battery bank.
Step 4: Connect the Solar Panel to the Charge Controller
-
Use MC4 Connectors: These connectors allow for a secure and weatherproof connection between the solar panel and the charge controller.
-
Wiring the Panel:
- Connect the positive terminal of the solar panel to the positive input on the charge controller.
- Connect the negative terminal of the solar panel to the negative input on the charge controller.
Step 5: Install a Fuse or Circuit Breaker
To protect your system from potential overloads, install a fuse or circuit breaker between the solar panel and the charge controller. This should be placed on the positive line as close to the solar panel as possible.
-
Choose the Right Rating: Select a fuse rated for slightly above the maximum current output of your solar panel. For instance, a 20A fuse is standard for a 300W panel at 12V.
-
Wiring the Fuse: Cut the positive wire between the solar panel and charge controller, strip the ends, and attach them to the fuse holder, ensuring secure connections.
Step 6: Final Connections and Testing
-
Double-Check Connections: Before powering up, ensure all connections are secure and properly insulated. Ensure no bare wires are exposed, which could lead to short circuits.
-
Power Up the System: Once everything is connected, expose the solar panel to sunlight. Use a multimeter to check the voltage at the battery terminals and ensure it is charging.
-
Monitor the Charge Controller: Ensure the charge controller indicates proper charging. Most units have LED indicators that show charging status.
Standard Solar Battery Connections Overview
When expanding an installation, managing multiple units requires a structured solar panel to battery connection schema. Batteries can be arranged in series to increase overall voltage or in parallel to increase capacity while maintaining the same voltage. Uniform cable lengths should be used across connections to maintain balanced charge distribution and conform to standard safety practices.
Common Mistakes
-
Incorrect Voltage Matching: Always ensure that the voltage of the solar panel matches the battery bank. Connecting a 24V panel to a 12V battery can damage the system.
-
Neglecting the Charge Controller: Skipping the charge controller can lead to battery overcharging, damaging or even destroying the battery bank.
-
Using Inadequate Wiring: Using cables that are too thin can lead to overheating and potential fire hazards. Always use the correct gauge wire for your system’s current.
-
Improper Fuse Rating: Selecting a fuse with the wrong amperage can either be ineffective (too high) or lead to unnecessary system shutdowns (too low).
-
Ignoring Safety Protocols: Not using safety gear or failing to power down the system before working can lead to severe accidents.
Technical Summary
Wiring a solar panel to a battery bank involves several critical steps, primarily involving the proper connection of components such as the solar panel, charge controller, and battery bank. The process requires careful attention to detail, especially regarding voltage compatibility, proper fusing, and ensuring all connections are secure and insulated. Regular monitoring and maintenance of the system will ensure longevity and efficiency, enabling the effective harnessing of solar energy for various applications.
By following the steps outlined in this guide, you will be able to confidently wire your solar panel to a battery bank, enhancing your understanding and capability within solar energy systems. Remember to always adhere to safety precautions and manufacturer specifications to maximize the performance and reliability of your solar setup.







